
This is the third tutorial in the CAD ON Quiet 3D Modeling series.
Quiet 3D Modeling 03 focuses on clean cylindrical holes and subdivision-friendly topology.
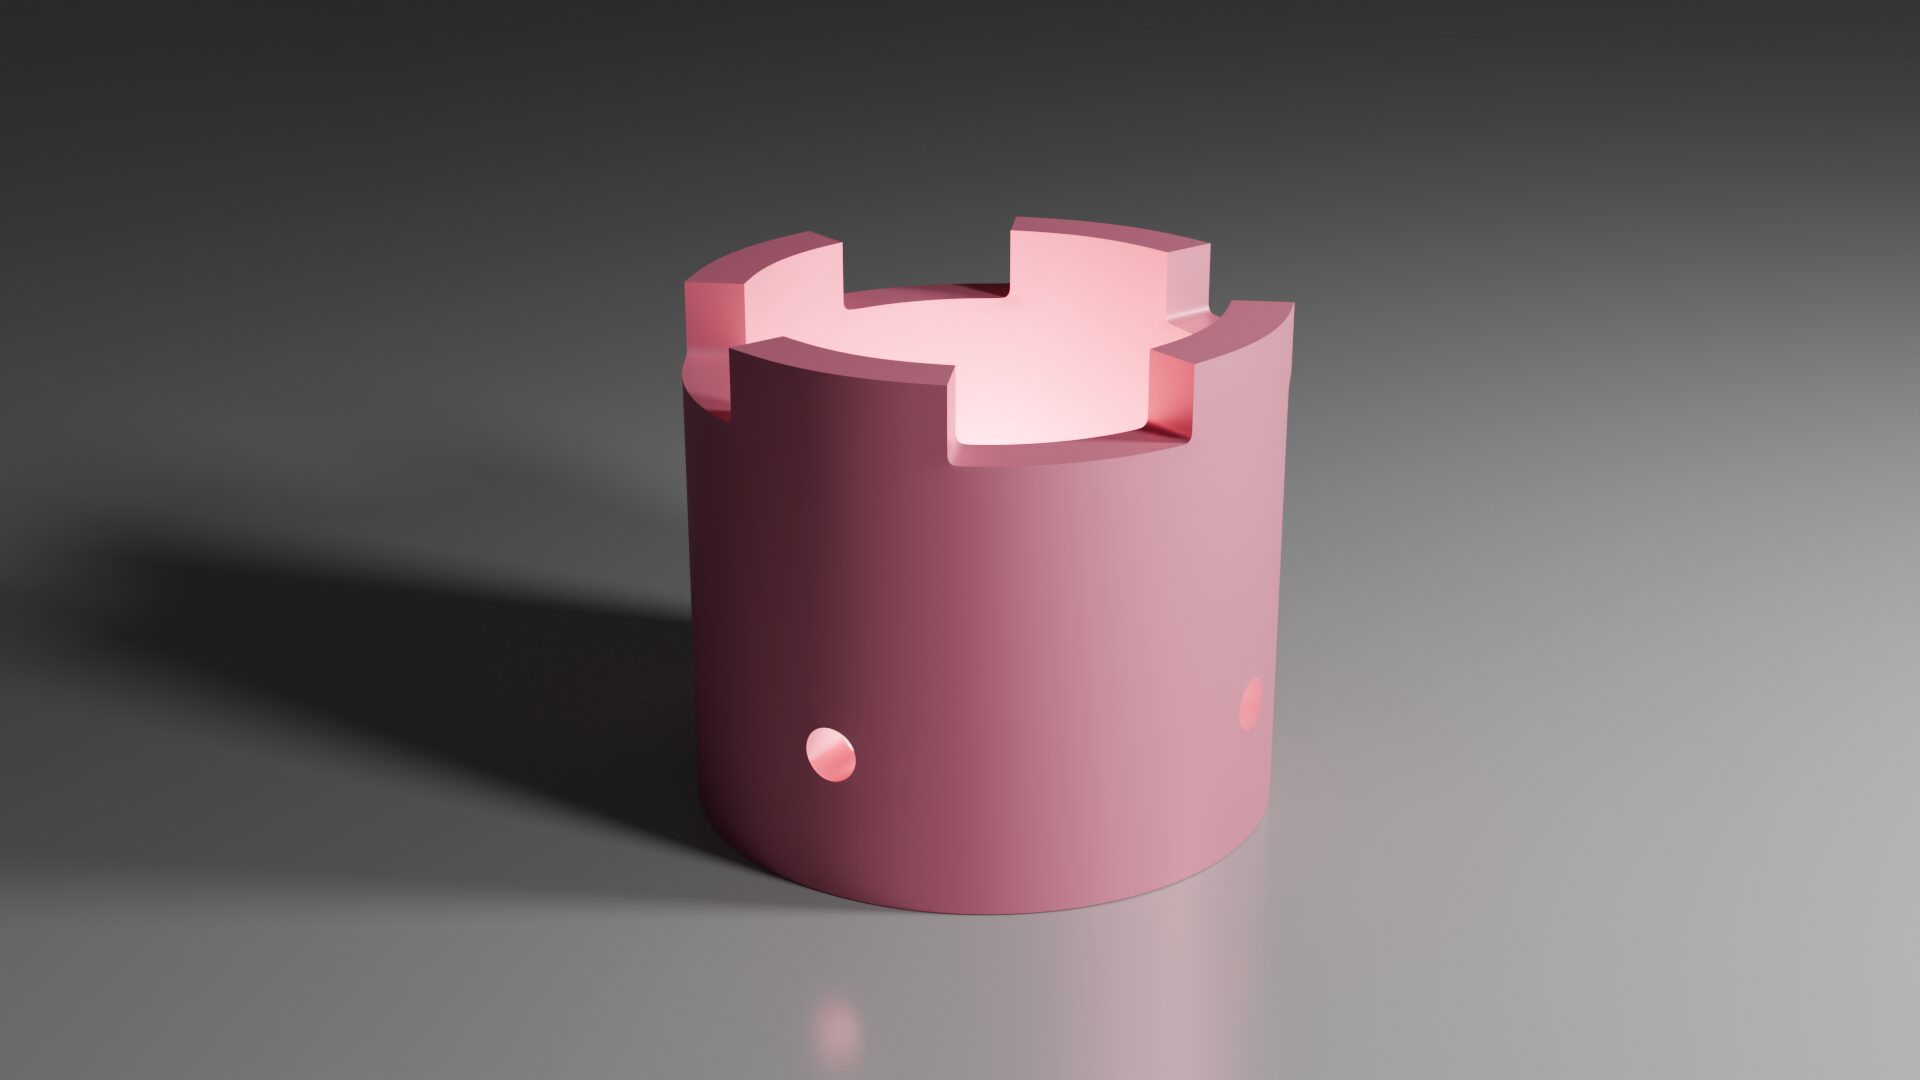
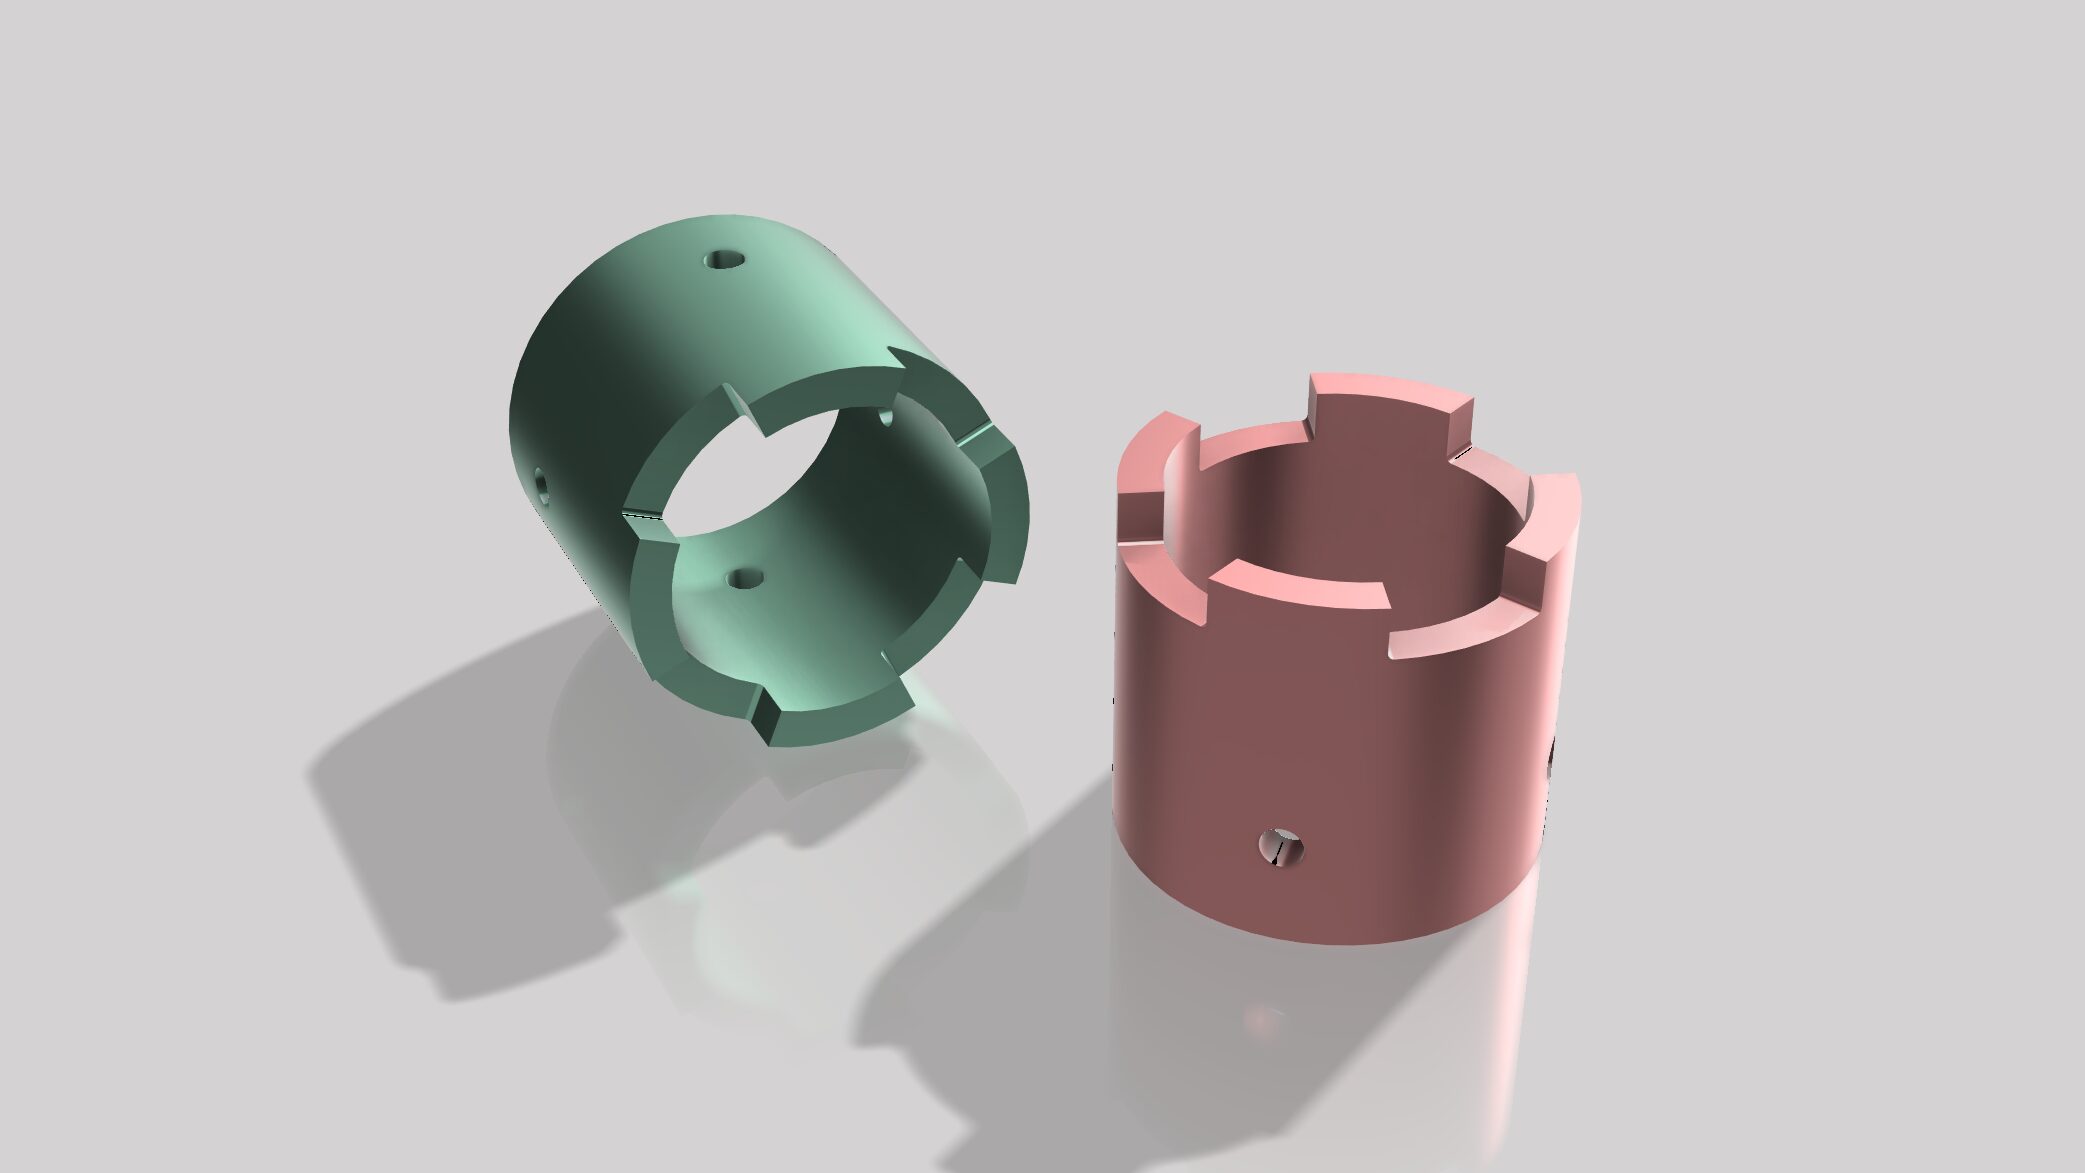
Using a simple mechanical part as the reference, the same Quad Slot Locator is modeled in Blender, with a calm and structured workflow.
CAD ON Quiet 3D Modeling シリーズの第3回チュートリアルです。
円筒にきれいな穴を開ける方法と、Subdivisionに対応したトポロジーを中心に解説しています。
シンプルな機械部品「Quad Slot Locator」を題材に、Blenderで落ち着いた作業フローの中でモデリングしています。
Drawing
Tutorial – Youtube
Fusion 360
Blender
Blender Modeling Flow
1 Object Setup
- Add a Cylinder
- In Edit Mode: Move Z +1
- In Object Mode: Set Z = 1.5
- Apply Scale (1 : 1 : 1)
2 Base Shape
- In Edit Mode, apply Inset 0.2 to top and bottom faces
- Create through holes on the inset faces
- Add loop cuts to the outer and inner cylindrical surfaces
3 Side Holes
- Add Circles on the front and side faces (Seg 8 / R 0.1)
- Rotate X 90° (Front), Y 90° (Side)
- Create holes on all sides (Use Mesh → Knife Project)
4 Detailing
- Create top protrusions with Extrude Faces 0.25
- Delete faces to keep only one quarter of the object
- Apply Bevel (Seg 3 / W 0.03)
- Clean up bevel topology
- Clean up topology around side holes
5 Finalizing
- Select edges and apply Edge Crease — 1
- Mirror on X and Y
- Merge by Distance
- Apply Subdivision (Level 2)
- Shade Auto Smooth
1 オブジェクト準備
- シリンダーを追加
- Edit Modeで Move Z +1
- Object Modeで Z = 1.5 に設定
- スケールを適用(1 : 1 : 1)
2 基本形状の構築
- 上下面に Inset 0.2
- インセット面に貫通穴を作成
- 円筒の外側・内側にループカット追加
3 側面穴の作成
- 正面と側面にCircleを追加(Seg 8 / R 0.1)
- 正面はX軸90°、側面はY軸90°回転
- 前後左右の面に穴を開ける(Mesh → Knife Project)
4 ディテール調整
- 上部突起を Extrude Faces 0.25 で作成
- オブジェクトの1/4を残して面を削除
- Bevel適用(Seg 3 / W 0.03)
- Bevel周辺のトポロジー整理
- 側面穴周りのトポロジー整理
5 仕上げ
- エッジを選択して Edge Crease — 1
- Mirror on X and Y
- Merge by Distance
- Subdivision適用(Level 2)
- Shade Auto Smooth
Quiet Modeling
Calm workflow, clear geometry
落ち着いたワークフローで、正確な形をつくる
Comment