Tutorial Overview
This is the seventh tutorial in the CAD ON Quiet 3D Modeling series.
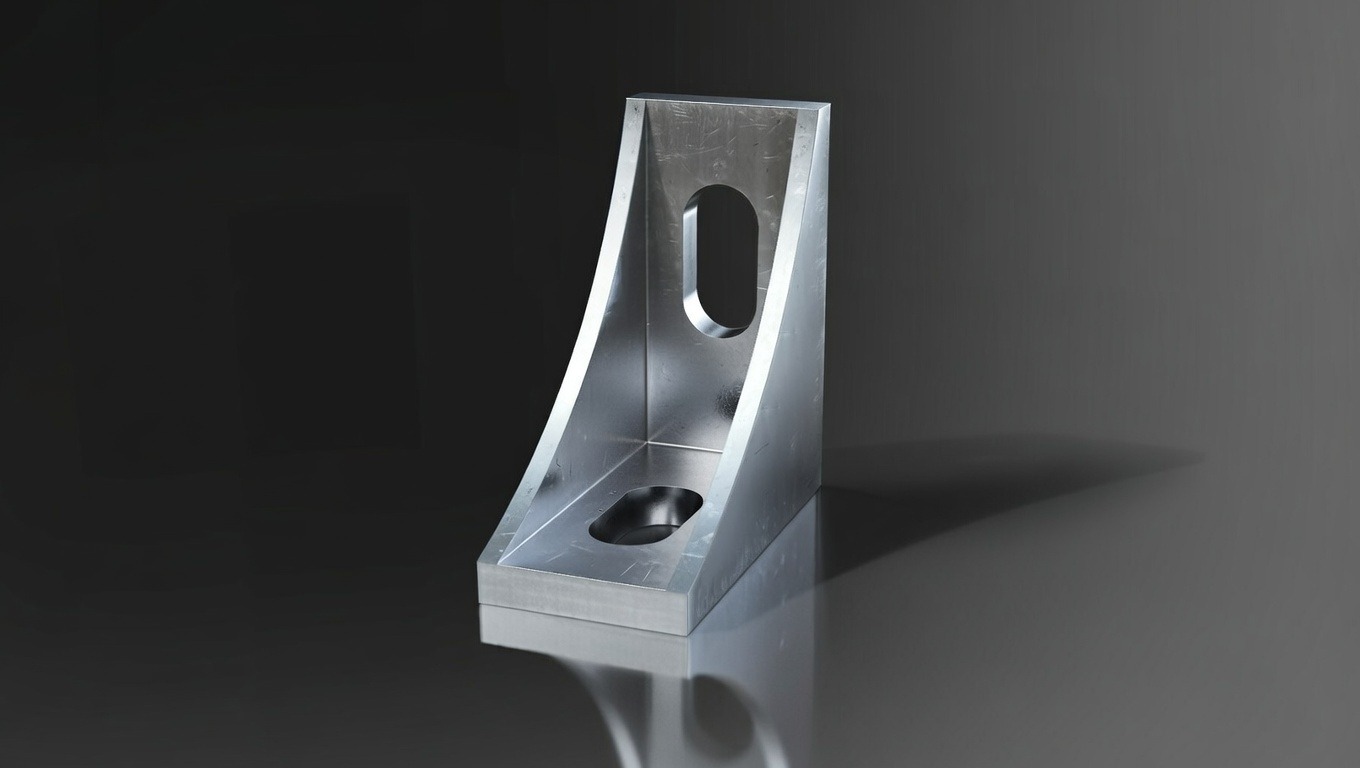
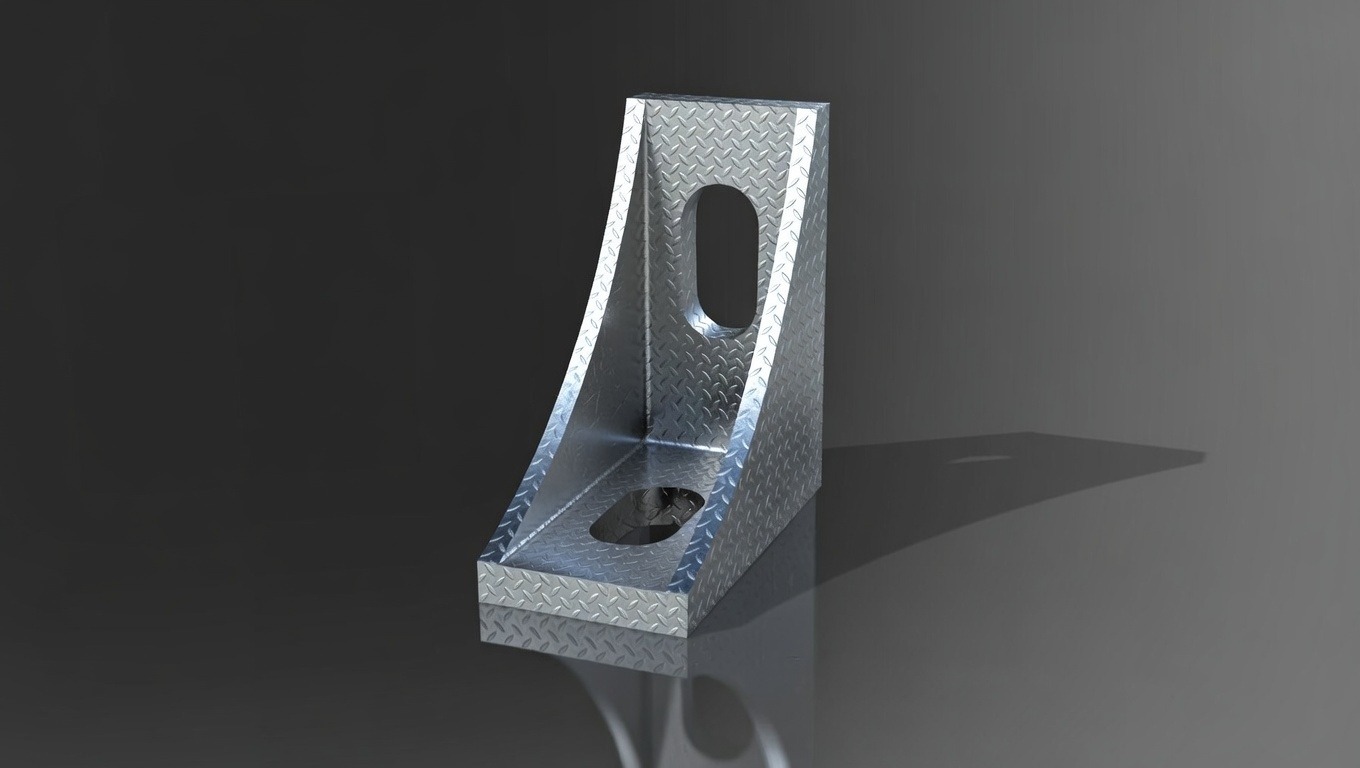
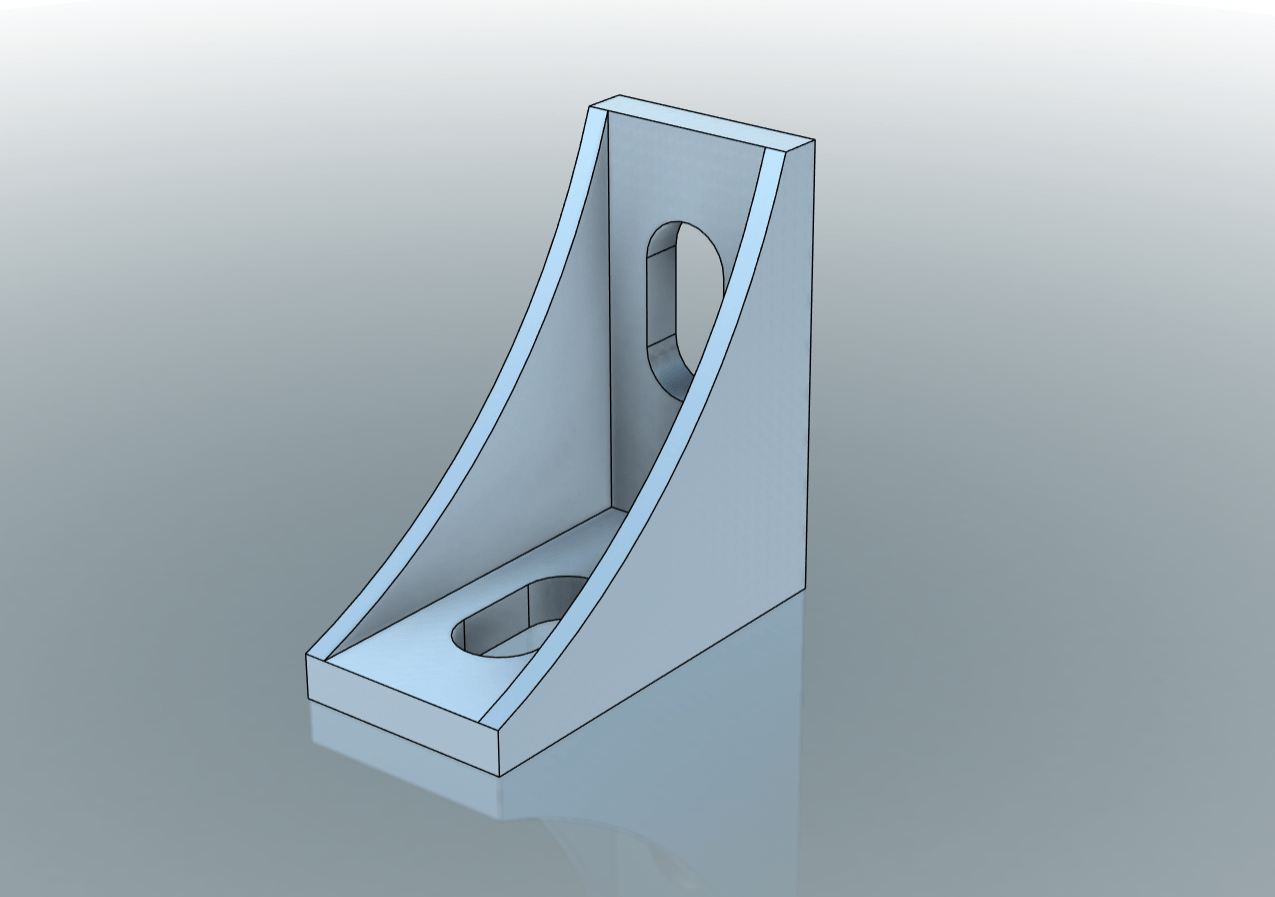
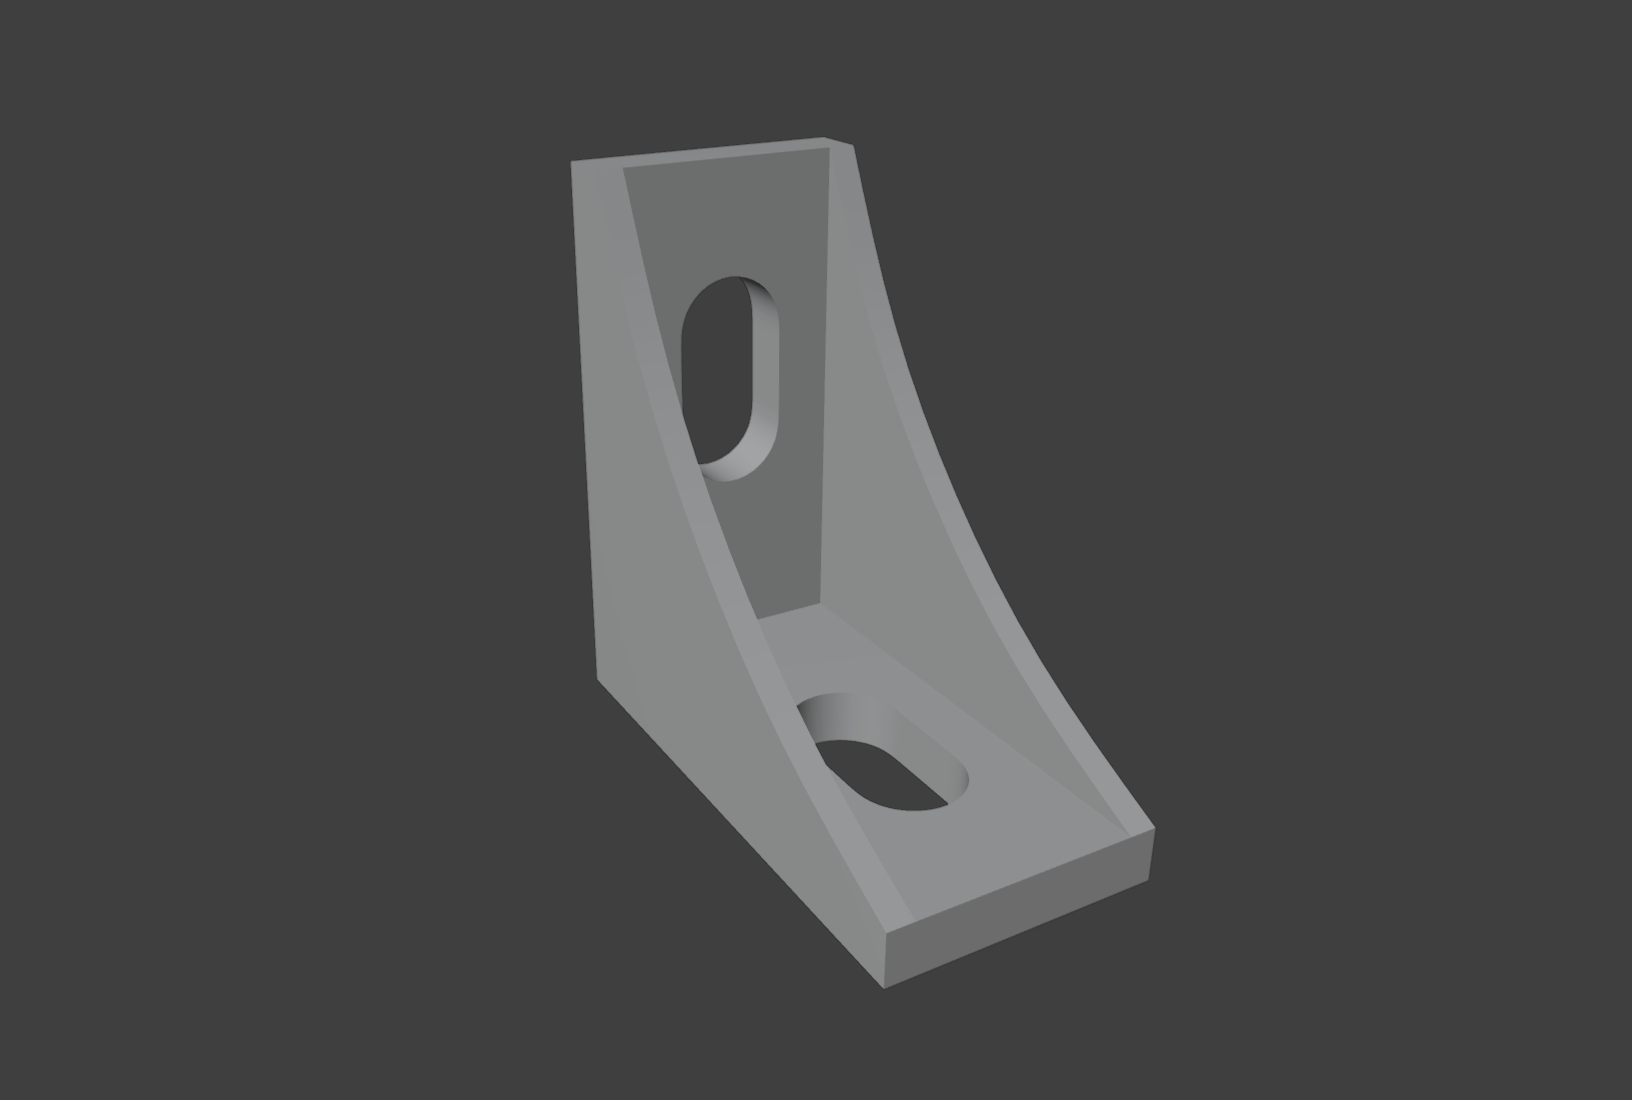
Quiet 3D Modeling 07 focuses on constructing a ribbed angle bracket with slots from a CAD drawing using disciplined, mechanical-design-oriented workflows in both Fusion 360 and Blender.
This tutorial demonstrates how the same part can be created through two different modeling approaches while maintaining clean geometry, controlled edge treatment, and a calm, systematic process suitable for mechanical design practice — covering slot construction, curved rib formation, and precise surface and edge control without relying on destructive operations.
CAD ON Quiet 3D Modeling シリーズの第7回チュートリアルです。
Quiet 3D Modeling 07 では、CAD 図面をもとに、Fusion 360 と Blender の両方で共通する機械設計志向のワークフローを用いて、スロット穴付きリブブラケットを作成しまています。
本チュートリアルでは、同一形状を二つの異なるモデリング手法で構築しながら、クリーンなジオメトリ、制御されたエッジ処理、落ち着いた体系的な工程を維持する方法を解説します。スロット作成や曲線リブ形成、精密な面・エッジ制御など、破壊的な操作に頼らない CAD 的思考を重視しています。
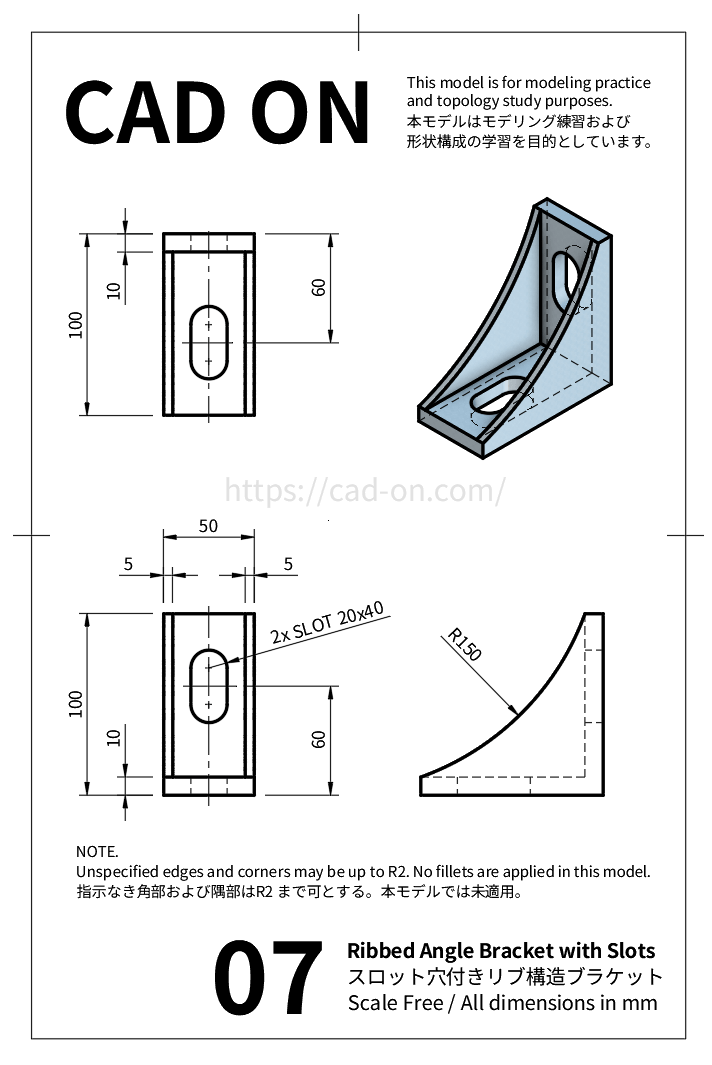
CAD Drawing
Drawing (JPG)
Drawing (PDF)
Tutorial Movie
Fusion 360
Blender


CAD Drawing for Practice
This section summarizes the modeling workflow and learning focus of Quiet 3D Modeling 07.
本セクションでは、Quiet 3D Modeling 07 のモデリング工程と学習フォーカスをまとめています。
Fusion 360 Modeling Flow
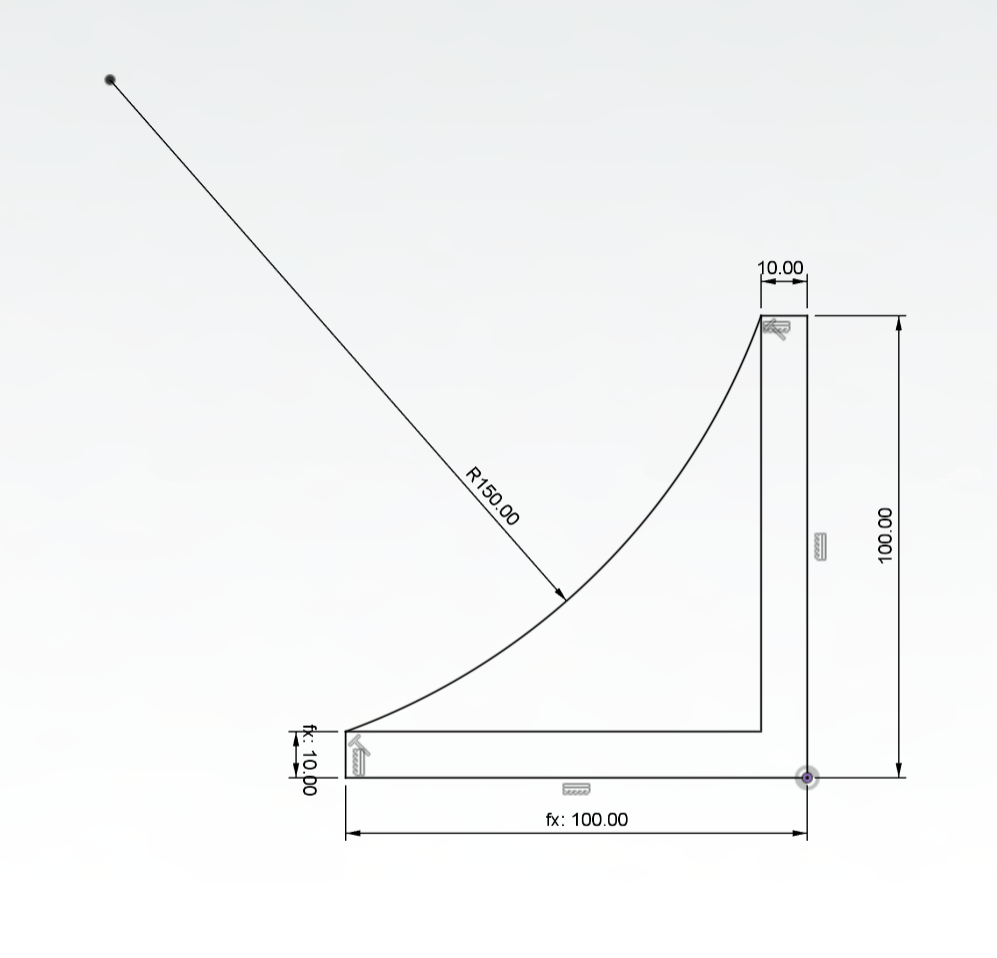
- Create the base profile sketch
- Extrude the entire sketch to 70 mm
- Cut the rib area (Symmetric, 60 mm)
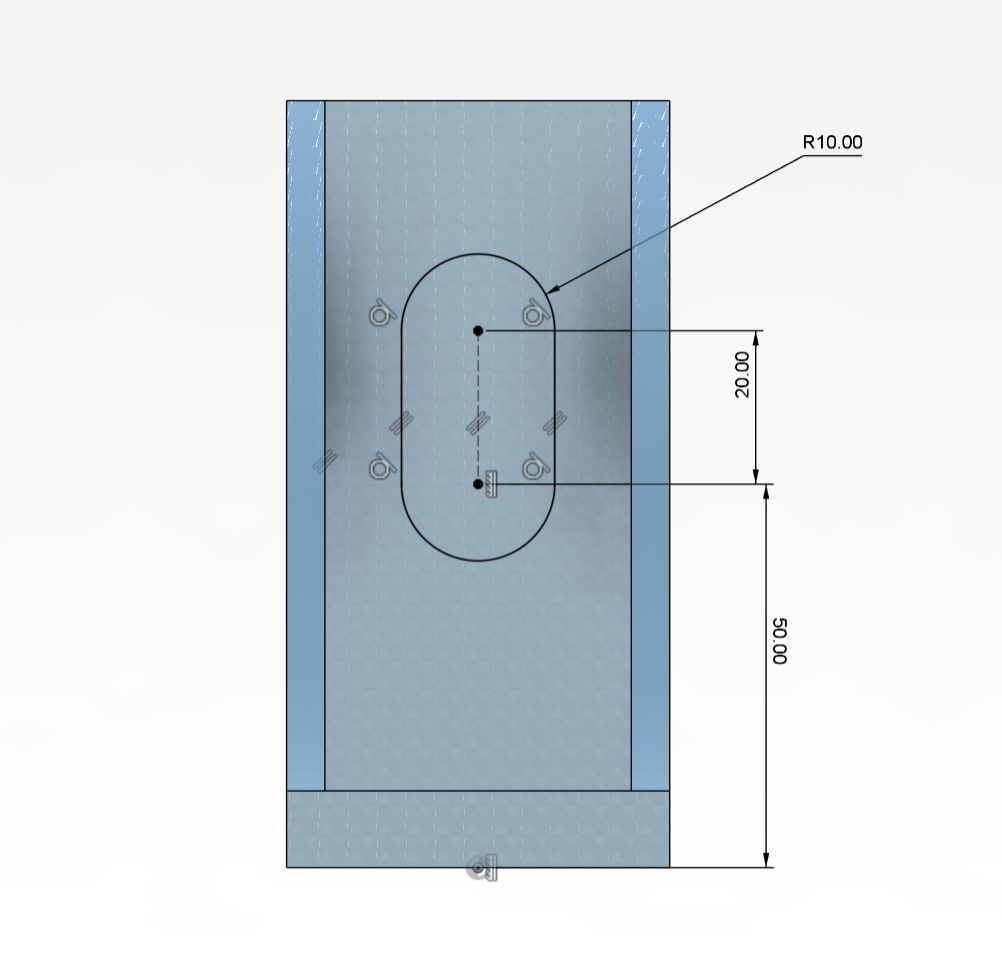
- Sketch the slot hole
- Cut the slot feature
- Create a 45° construction plane
- Mirror the slot using the plane
- ベース形状のスケッチ作成
- スケッチ全体を 70 mm 押し出し
- リブ部分を対称カット(60 mm)
- スロット穴のスケッチ
- スロットを切り取り
- 45° の作業平面を作成
- 平面基準でスロットをミラー
Fusion 360 Learning Focus
1) Sketch-Driven Design
- Build the bracket from the sketch
- Combine straight lines and curves
- Fully constrain dimensions
2) Solid Basics: Extrude & Cut
- Create the base body with Extrude
- Use Symmetric Cut for rib shaping
- Plan feature order
3) Sketching on Multiple Faces
- Switch working faces smoothly
- Place slot holes accurately
- Control reference points
4) Construction Planes
- Create a 45° plane
- Design mid-planes for symmetry
- Learn reference-based modeling
5) Mirror for Clean Design
- Mirror slot features
- Keep the model parametric
- Make edits easy later
1) スケッチ主導の設計
- スケッチ段階でブラケット形状を構想
- 直線と曲線の組み合わせ
- 寸法拘束を完全に設定
2) 基本操作:押し出し & 切り取り
- 押し出しで本体作成
- 対称カットでリブ形状
- フィーチャ順序の考え方
3) 複数面スケッチ
- 作業面の切り替え
- スロット穴の配置
- 基準点の活用
4) 作業平面(Construction Plane)
- 45° 平面の作成
- 対称用基準面
- 参照設計の基礎
5) ミラーで設計を整理
- スロットの対称配置
- パラメトリック設計
- 後編集に強い構造
Blender Modeling Flow
- Add Cube → X 0.5 / Y 1 / Z 1
- Adjust Scale
- Enable Grid Snap → Add Loop Cut
- Top Face → Extrude Manifold
- Select Lead Edges → Bevel (Segments 4 / Profile 0.15)
- Grid Snap On → Add Loop Cut at Slot Position
- Add Circle → Verts 10 / R 0.105 / X 90°
- Increment Snap → Move & Scale Circle
- Separate Circle → New Object
- Select Circle → Knife Project on Cube
- Select Faces → Bridge Edge Loops
- Add Loop Cuts → Clean Topology
- Select Sharp Edges → 60°
- Apply Edge Crease → 1
- Apply Subdivision → Shade Auto Smooth
- キューブ追加 → 寸法 X 0.5 / Y 1 / Z 1
- スケール調整
- グリッドスナップON → ループカット追加
- 上面 → マニホールド押し出し
- リブエッジ選択 → ベベル(セグメント 4 / プロファイル 0.15)
- グリッドスナップON → スロット位置にループカット追加
- 円を追加 → 頂点 10 / 半径 0.105 / X回転 90
- インクリメントスナップON → 円を移動・スケール
- 円を分離 → 新規オブジェクト
- 円を選択 → ナイフ投影でキューブにエッジ作成
- 面を選択 → エッジループをブリッジ
- ループカット追加 → トポロジー整理
- シャープエッジ選択 → 60°
- 選択エッジにクリース → 1
- サブディビジョン適用 → オートスムーズ
Blender Learning Focus
- Create Holes without Boolean
- Create Slots Using Circles
- Knife Project Workflow
- Extrude Manifold Usage
- Create Curved Ribs with Bevel
- Select Sharp Edges
- Sharpen Edges with Edge Crease
- ブーリアンを使わずに穴を作成
- 円を使ってスロット作成
- ナイフ投影の使い方
- マニホールド押し出しの使い方
- ベベルでリブ曲線を作成
- シャープエッジ選択
- エッジクリースで角を立てる
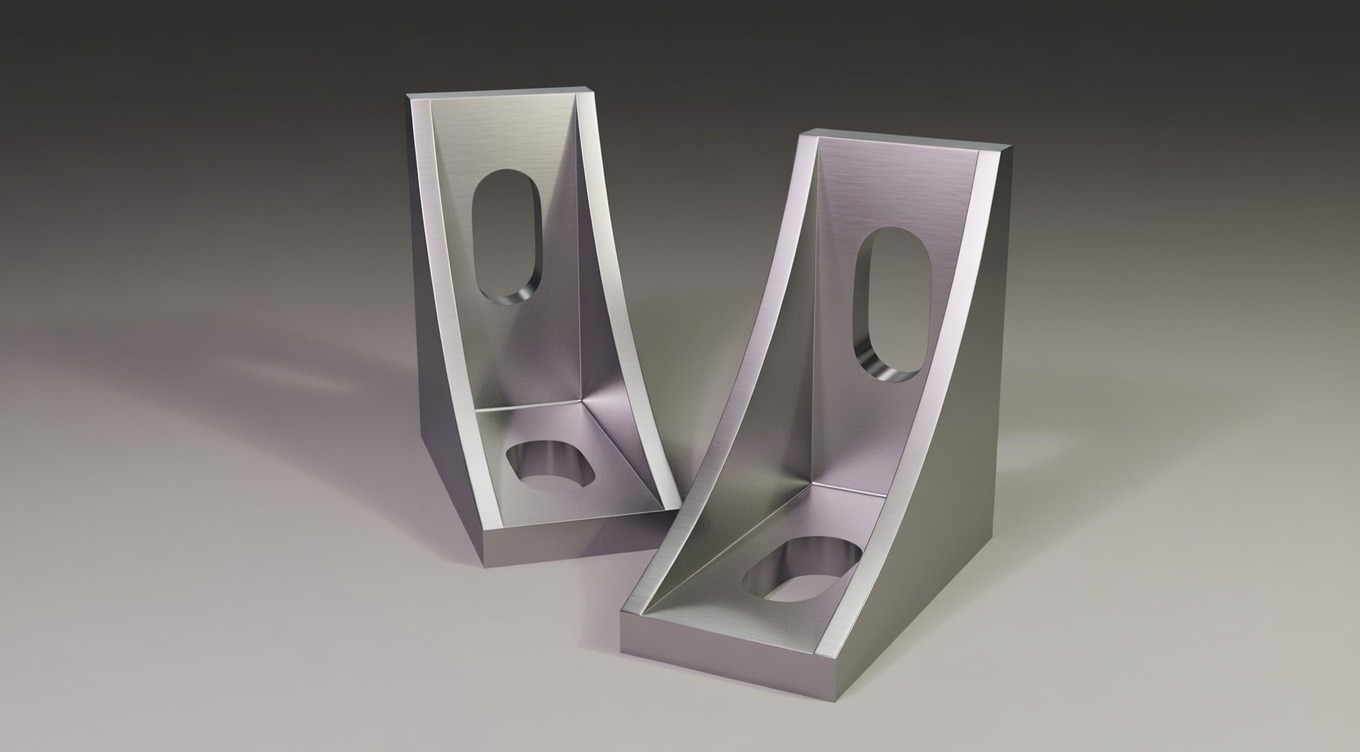
Rendered Results

About Quiet Modeling
Quiet Modeling is a calm, CAD-oriented approach to mechanical modeling.
It focuses on clean geometry, controlled edge treatment, and disciplined workflows that prioritize structure over shortcuts.
In the CAD ON series, the same drawing is modeled using different tools to highlight shared engineering thinking rather than software-specific tricks.
The goal is not speed, but clarity — building parts with intention, precision, and repeatable processes.
Quiet Modeling is about learning how to think like a mechanical designer, one model at a time.
Quiet Modeling は、落ち着いた CAD 思考を軸にした機械モデリングのアプローチです。
クリーンな形状、制御されたエッジ処理、近道に頼らない体系的な工程を重視しています
CAD ON シリーズでは、同一の図面を異なるツールで作成することで、ソフト固有の操作ではなく、共通する設計思想に焦点を当てています。
目指すのはスピードではなく、明確さ――意図を持ち、精度の高い再現可能なプロセスで部品を構築することです。
Quiet Modeling は、一つひとつのモデルを通して機械設計の思考を身につけていくための取り組みです。